
 It's hard to keep up with the latest trends in interior design when it changes so often. But a common request we get from customers is to revive their outdated wallpaper-clad rooms with a popular new paint color.
Many people ask us if it's OK to just paint over the old wallpaper to avoid having to remove it. Technically it can be done, but if you really care about how your finish will look on your freshly painted walls then it is most certainly not something that we would recommend.
Wallpaper removal doesn't have to be the nightmare that many people might imagine it to be. If you follow the proper steps and do it right, then I can assure you that you'll be much happier with the final look.
For The Lucky Ones
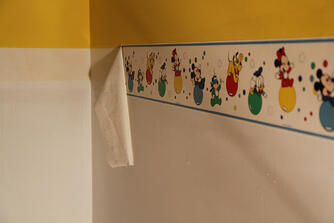
Depending on what type of adhesive the wallpaper hanger used and whether or not they properly sized the walls before applying it, will determine how easily it comes down. If you're feeling lucky, then find a corner along a seam of the paper near the ceiling and gently begin to peel the paper away from the walls to see if it will come down.
If it comes off easily then you may be well on your way, but if it begins to peel the paper facing off of the drywall surface below then stop right away and start following the steps I outline in this article.
Even if you're fortunate enough to have the paper come down easily you will still need to follow some of the steps below to remove the adhesive residue from the walls before you can paint.
For Everyone Else - Let's Get Down To Business
Step 1: Gather Your Tools & Supplies
For this project you'll need
- wallpaper scoring tool
- 3" or wider metal putty knife
- concentrated wallpaper stripping solution
- pressurized pump sprayer
- canvas drop cloths & plastic sheeting
- electric wallpaper steamer (can be rented at local paint store or tool rental company)
- portable work lighting (can be rented at a local tool rental company)
- 2" wide blue painter's tape
- plastic trash bags
- small step ladder
- cleaning sponge
Step 2: Prepare Your Work Area
A.) Start by removing any furniture, pictures, appliances, etc. from the work area or at least move them to the center of the room and cover them with a large plastic drop cloth.
B.) Using the blue painter's tape, tape some plastic sheeting or a plastic drop cloth to the top of the baseboard and run the remainder of the sheet out into the room to cover the floor to protect them from the solution. Lay a canvas drop cloth over top of the plastic sheeting on the floor along the walls to help absorb some of the excess liquid that runs onto the plastic, to keep it from becoming a slip hazard.
Cover your door trim moldings with painter's tape to protect them as well.
C.) Setup your portable work lighting, plugging it in in an adjoining room.
Have someone who knows how your home's circuit breaker box works to kick off the breaker or breakers supplying power to the room where you'll be working. You're going to be spraying liquid onto your walls and you want to take all precautions to keep from coming in contact with live electic devices/outlets.
Test all of the switches in the room to make sure there is no power being supplied to the room, and use a small electic appliance to test all of the outlets as well.
Once the power has been disconnected, remove the switch and outlet covers so you can get to the edge of the wallpaper behind them. Use the painter's tape to cover the switch/recepticle box openings to keep them from getting wet inside.
Step 3: Soften The Paper & Glue
A.) First, take your scoring tool and thoroughly run it across the surface of the wallpaper in a random circular motion. The scoring tool has small teeth that will cut through the surface of the paper to allow the stripping solution to more effectively loosen the grip that the adhesive has on the wall. The better you score the surface the easier it will be to remove the paper.
B.) Mix your stripping solution concentrate with HOT water (per the manufacturer's directions) in your pump sprayer. Spray the solution liberally onto the walls, avoiding your electrical box openings.
Allow the solution time to break down the wallpaper adhesive according to the instructions on the bottle. This will make your manual labor easier when it comes time to scrape the walls.
Step 4: Strip The Paper & Glue
Find a corner at a seam where two strips of the paper meet near the ceiling and start peeling the paper down the wall. Use your metal putty knife to scrape under the peeling edge of the paper as you pull, being careful not to gouge the wall with your knife. This will help you to keep the paper coming down in as few, and as large of sections as possible.
If the paper is still stubbornly clinging to the wall try applying some additional solution to soften up the glue.
Once the bulk of the paper has been taken down, continue to apply the solution and scrape away any remaining paper backing and glue residue, until the walls are completely free of any evidence of the previous paper. You can use a long handled wallpaper blade scraper to assist you, but be extra careful as they can easily cause damage to your drywall that you'll have to repair before you paint.
Make sure you keep your work floor area clear of the old strips of wallpaper as they can be very slipper when wet, and could present a slip hazard.
*Tip* If after a couple of attempts the paper is still not coming off, try using the electric wallpaper steamer. The steamer will help you to more aggessively attack any adhesive that just doesn't want to let go.
Step 5: Prepare The Walls For Paint
As soon as you've removed all of the paper and glue residue from the walls, take a large cleaning sponge with some solution and wipe down the walls to remove any film that the adhesive can sometimes leave behind.
Now take you sponge with some fresh hot water and wipe away any residue from the solution.
Allow your walls to thoroughly dry and inspect them carefully for any damage or remaining glue as these will show through your new coat of paint. See our recent blog post on preparing your walls for interior painting for tips on making various types of drywall repairs.
Make sure you sand any rough spots smooth, and if you accidentally damaged or tore the paper facing on the drywall, spot prime the affected areas with a good latex primer that's made for new drywall.
If you're located in the Greater Pittsburgh or Western Pennsylvania areas and would like a free quote on having your wallpaper removal or painting project done by a professional please click on the link below.


Contact the Pros
Ready to get started with your next painting project but unsure if it is in your budget? Reach out to the expert painting team at ImageWorks Painting to schedule a free consultation today. Give us a call at 724-898-2446, or request a visit online.